As mentioned in my previous posts, my team worked on a big project – migrate organization's offline interfaces from Microsoft Biztalk to TIBCO BW.
We decided to configure continuous integration using Jenkins in order to short and automate development process.
Main goal was:
A developer checks-in TIBCO BW project → Jenkins triggers the check-in → Validate project by "validateproject.exe" tool →Build a project ear file (used for deployment) by "buildear.exe" tool → Deploy project to development domain by "AppManage.exe" tool
First step – Install and Configure Jenkins
- Download Jenkins (for Windows) from here: https://jenkins.io/content/thank-you-downloading-windows-installer#stable
- Next thing is to log in with "admin" user name (Initial pass stored in: Jenkins\secrets\initialAdminPassword).
- From the left menu choose: Manage Jenkins → Manage Plugins
Please Install: Team Foundation Server Plug In, PowerShell Plug In
(You might need to install all their dependencies before).
- From the left menu choose: Manage Jenkins → Configure System
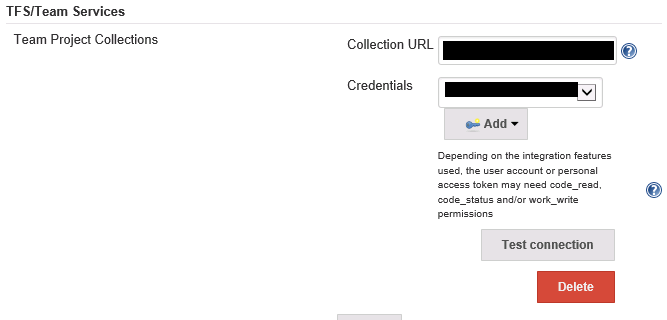
- Set TFS URL with relevant credentials. Test connection when done:
- Set Jenkins location and System Admin e-mail address. This address would appear in e-mail notifications as "From":

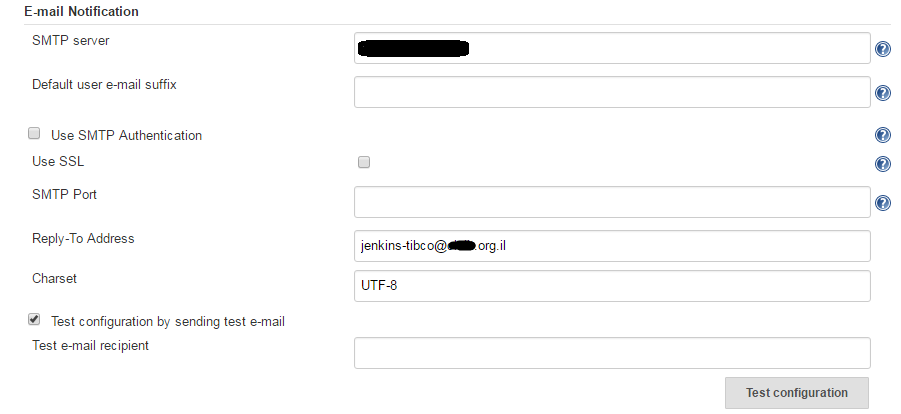
- Set SMTP Server and try to send a test e-mail:
Second step – Configure new items
- Click on Jenkins logo on top-left:
In this screen you would see all items configured (currently none).
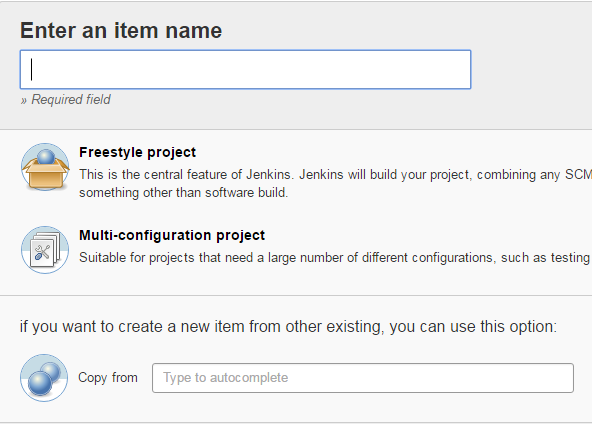
- Choose from the left menu New Item.
Type the item's name and choose Freestyle project.
It's also possible to create an exact copy from an existing item and after just modify configurations. This is VERY useful if you create many items which has almost the same configurations.
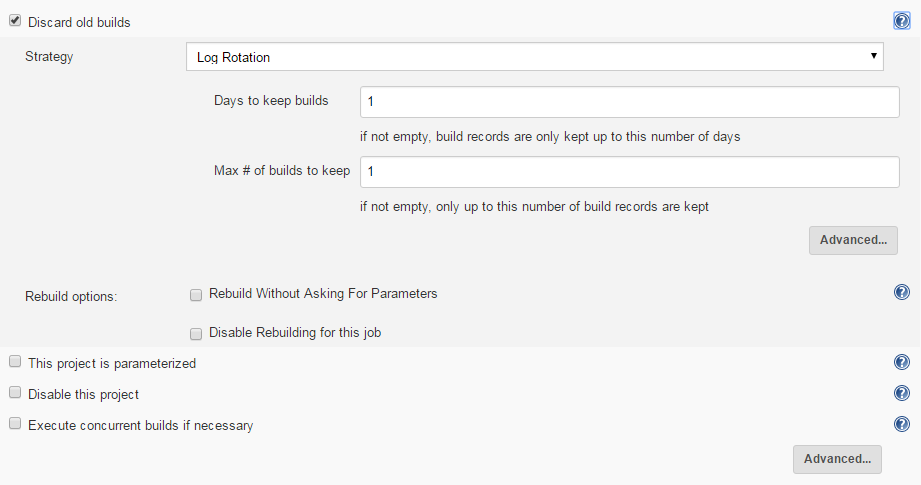
- In the item config screen you might want to check "Discard Old Builds" in order to keep just relevant content and to not overload storage.
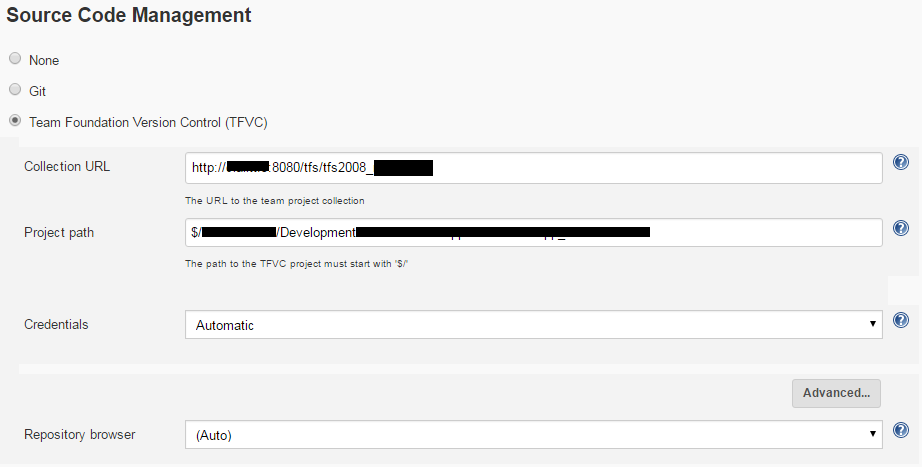
- Next thing is to configure which project the item would monitor.
Type Collection URL and path to project (starts with "$" sign. For instance: $/Development/Test_Project):
- It's possible to define many build triggers. We needed a simple trigger: once a developer checks-in a project.
Best way to achieve it is to mark: "Build when a changed is pushed to TFS/Team Services". Unfortunately, this option would work only since TFS 2015.
We picked "Poll SCM" and typed "H/5 * * * *" (poll for change every 5 minutes).

- Next is configuring build steps. You can add as many as you wish.
In this tutorial we would have 3 build steps for a tibco project:
- Validate project
- Create an ear file for deployment
- Deploy

- It's possible to configure many post-build actions. We just used the E-Mail notification to the team's mail:

Third step – Writing the build scripts: Validate, Build Ear, Deploy Ear
Tibco 5.13 offers 3 executables:
Validate project:
C:\tibco\designer\5.10\bin\validateproject.exe [arguments]
Build .ear file:
C:\tibco\tra\5.10\bin\buildear.exe [arguments]
Deploy .ear file:
C:\tibco\tra\5.10\bin\AppManage –upload –ear [arguments]
Each one produces an output which we needed to analyze with regex.
It's impossible to get only regex matches using Command-Line so we had to use PowerShell.
Project configuration would look like:

Build Step 1: Validate project
We've added a path to a powershell script in order to validate a project:
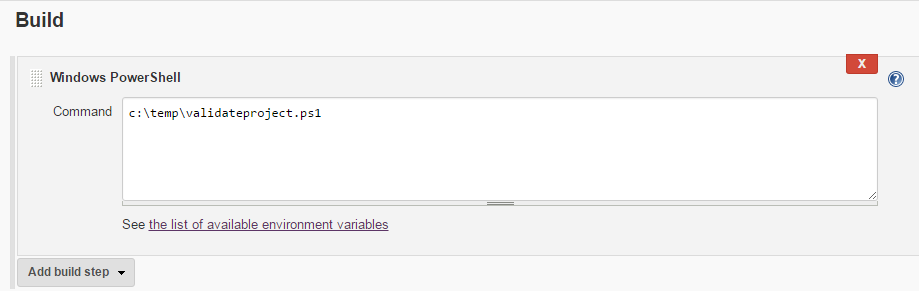
It's a good practice to keep the script in a file. This file is shared across all projects and any change in it would affect all immediately.
Let's take a look on this script content (please note the remarks):
# Sets current location to "validateproject.exe" folder
Set-Location "C:\tibco\designer\5.10\bin"
# Executes validateproject
# VERY IMPORTANT – "-a" sets the alias library references. It's crucial for the #validation process
$tmp = .\validateproject.exe -a "C:\TibcoData\properties\FileAlias.properties" $ENV:WORKSPACE
# write output to console just for tracing
echo $tmp;
# This regex filters the number of errors
$regex = '[0-9]+ errors'
$output = select-string -InputObject $tmp -Pattern $regex -AllMatches | % { $_.Matches } | % { $_.Value } | Out-String
# If regex output is NOT "0 errors" (that means that validation process has errors)
if($output -NotMatch "0 errors")
{
# exit code 10 (If it's not 0, then Jenkins would fail the build)
exit 10
}
Build Step 2: Build project ear file
Second step is to build project ear file which will be used for deployment in the next step.
# Sets current location to "buildear.exe" folder
Set-Location "C:\Tibco\tra\5.10\bin"
# Executes BuildEar
$tmp = .\buildear -a "C:\TibcoData\properties\FileAlias.properties" -x -v -s -ear ""/Deploy/$ENV:JOB_NAME.archive"" -o ""C:\TibcoData\ears\deployment\Jenkins\$ENV:JOB_NAME.ear"" -p ""$ENV:WORKSPACE""
# write output to console just for tracing
echo $tmp;
# Checks if "Ear created in:" (until line break) string is inside $tmp (output of buildear)
$regex = 'Ear created in:.*'
$output = select-string -InputObject $tmp -Pattern $regex -AllMatches | % { $_.Matches } | % { $_.Value } | Out-String
# If output doesn't contain "Ear created in" then fail the build (exit code 10)
if($output -notlike "Ear created in:*")
{
exit 10
}
Build Step 3: Deploy project ear file
Last step is to deploy ear file to development domain.
# Sets current location to "AppManage.exe" folder
Set-Location "C:\tibco\tra\5.10\bin"
# Deploy ear to development domain
$tmp = .\AppManage -user "admin" -pw "admin" -domain "DEV_01" -app "$ENV:JOB_NAME" -upload -ear "C:\TibcoData\ears\deployment\Jenkins\$ENV:JOB_NAME.ear"
# Write deploy output to console
echo $tmp;
# Check if deployment finished successfully
$regex = 'Finished successfully in.*'
$output = select-string -InputObject $tmp -Pattern $regex -AllMatches | % { $_.Matches } | % { $_.Value } | Out-String
# If output doesn't contain "Finished successfully in" then fail the build (exit code 10)
if($output -notlike "Finished successfully in*")
{
exit 10
}

